

How to Build a Montessori Toy Collection: A 2026 Guide
Table of Contents
- Start With a Plan: How to Build a Montessori Toy Collection Over Time
- The Age-by-Age Montessori Toy Checklist
- Montessori Toys for Toddlers: Choosing by Skill, Not by Shelf
- DIY Montessori Toys You Can Make From Household Materials
- How to Organize Montessori Toys on Low Shelves
- Montessori Toy Rotation: Fewer Toys, More Focus
- Safety, Materials, and Budget: What to Check Before You Buy
- Conclusion: Build Slowly, Observe Often
- Frequently Asked Questions
Last Updated: October 6, 2026
Start With a Plan: How to Build a Montessori Toy Collection Over Time
A Montessori toy collection is a small, rotating set of simple, open-ended toys matched to what a child can do right now, then swapped as skills grow.
The toys are not the problem. The order you buy them in is. Here is the plan we recommend.
- Start with one skill. Pick a single area, like grasping or sorting.
- Buy two or three items. Enough to rotate, not enough to overwhelm.
- Watch for two weeks. Note what your child returns to without help.
The American Academy of Pediatrics guidance on play and development is clear that simple, hands-on play does more for early development than screens or battery-powered toys.
The Age-by-Age Montessori Toy Checklist
Ages matter less than skills, but they give you a starting point. Use this checklist as a rough guide, not a rulebook.
The column that matters most is the last one: what to retire. A collection stays useful only if pieces leave the shelf as often as they arrive. If a toy has been skipped for two straight rotations, it is either too easy or too hard.
| Age | Main Focus | Example Toys | Rotation Size | What to Retire |
|---|---|---|---|---|
| 0-6 months | Tracking, reaching, cause and effect | High-contrast cards, wooden rattle, soft cloth ball | 1-2 items | Anything your baby no longer turns toward |
| 6-12 months | Grasping, mouthing, transferring | Treasure basket, wooden eggs, fabric scraps, posting box | 2-3 items | Items too small to mouth safely |
| 1-2 years | Practical life, fine motor, walking | Busy board, shape sorter, stacking cups, push wagon | 3-4 items | Toys your toddler has fully mastered |
| 2-3 years | Sorting, matching, language | Sorting cube, harvest box, lacing cards, object permanence box | 4-5 items | Baby toys that no longer challenge |
| 3-4 years | One-skill tasks, early math, independence | Counting rods, sandpaper letters, pouring set, puzzle maps | 4-5 items | Toys that do the work for the child |
0 to 6 Months: Tracking, Reaching, and First Cause-and-Effect
Newborns learn by looking and listening before they can hold anything. High-contrast black-and-white cards held 8 to 12 inches from the face give them something to track, and a light wooden rattle introduces cause and effect: I move, it makes sound.

Keep this stage to one or two items. Anything your baby stops turning toward is ready to come off the shelf.
6 to 12 Months: Grasping, Mouthing, and Transferring
Babies at this stage learn through their hands and mouths, so offer items that are safe to hold, drop, and chew.
A treasure basket works well: fill a shallow basket with a wooden spoon, a small cloth, and a metal cup, then let your baby pull them out and explore.
Keep the basket small. Two or three items is plenty. Anything small enough to fit through a toilet paper tube is a choking risk.
1 to 2 Years: Practical Life and Fine Motor Skills
Toddlers want to do what you do, so this is the age for practical life activities: zipping, buckling, pouring, wiping.
The Montessori Busy Board gives little hands real buckles, zippers, and laces to work with, building hand coordination and patience at once. Pair it with a shape sorter and stacking cups. Three to four items on the shelf is the sweet spot.
2 to 3 Years: Sorting, Matching, and Language
Preschoolers are ready for toys that teach one thing at a time: sorting by size, matching shapes, or stacking in order.
The Montessori Shape Sorting Cube asks for one skill, matching a shape to its hole, and nothing else. That focus is what makes it work. Add a harvest box for counting and size comparison, and lacing cards for hand control.

3 to 4 Years: One-Skill Tasks and Early Independence
By three, children can follow multi-step tasks and show real preference. This is the age for counting rods, sandpaper letters, a pouring set, and simple puzzle maps.
The goal is independence: a child who can choose a task, complete it, and put it back without help. Toys that do the work for the child, like electronic talking toys, work against that goal.
Montessori Toys for Toddlers: Choosing by Skill, Not by Shelf
Choosing by skill means asking one question before you buy: what can my child almost do? Then buy for that.
Most parents buy by age or by how a toy looks. That leads to shelves full of toys that are either too easy or too hard.
Try this instead:
- Watch your child for a week without adding anything new.
- Note the task they keep trying but cannot finish yet.
- Buy one toy that targets that exact task.
- Give it two weeks before judging it.
A shape sorter targets matching. A harvest box targets size and counting. A bead maze targets hand-eye coordination.
DIY Montessori Toys You Can Make From Household Materials
You can make a surprising number of Montessori-inspired toys from things already in your home, keeping costs down and letting you test a skill before buying anything. A few that work well:
- Cardboard posting box. Cut slots in a shoebox lid. Give your child large wooden coins or poker chips to drop in.
- Fabric scrap basket. Collect different textures: felt, corduroy, silk. Let your baby pull them out and feel them.
- Jar and lid matching. Save empty jars with screw lids. Your toddler matches each lid to its jar.
These are not replacements for well-made wooden toys. They are a cheap way to test what your child is ready for before you invest.
How to Organize Montessori Toys on Low Shelves
Low, open shelves are the backbone of a Montessori environment at home. The rule is simple: if a child can see it, they can reach it, and if they can reach it, they can choose it.
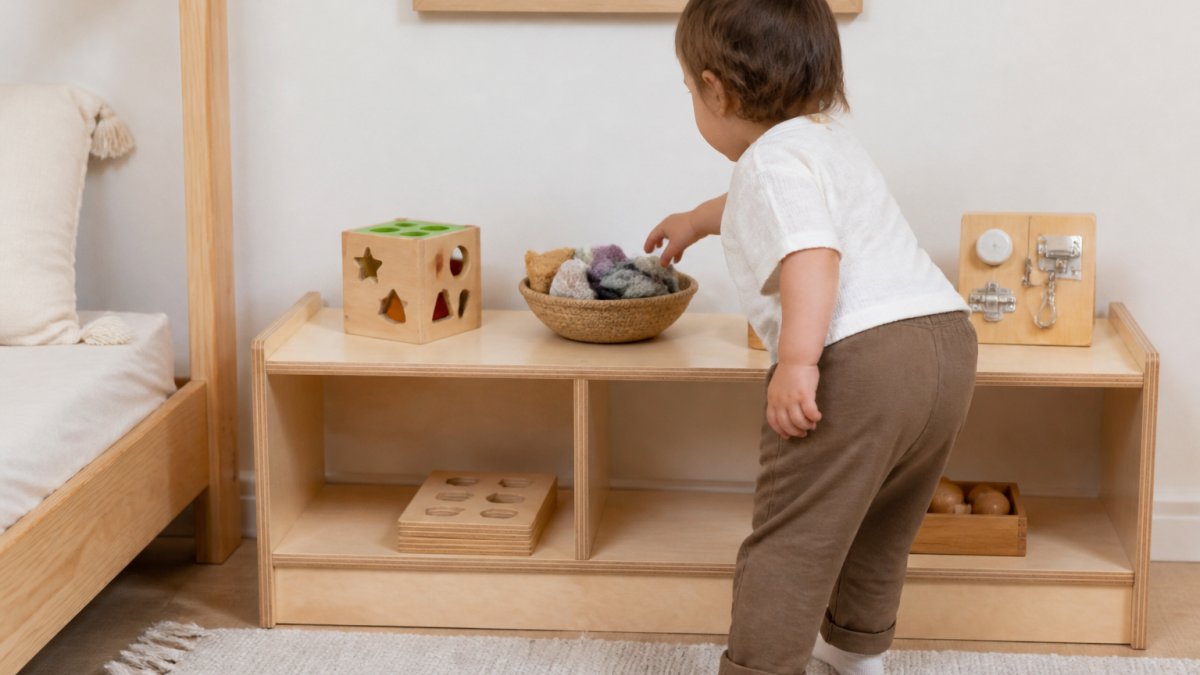
Set the shelf at your child's height, not yours, so a toddler can reach every item without climbing. Then:
- One item per space. No piles, no bins stuffed full.
- Group by type. Sorting toys together, practical life tools together.
- Leave gaps. Empty space on a shelf is not wasted. It makes choices clearer.
A shelf with five well-chosen toys gets used more than a shelf with twenty.
Montessori Toy Rotation: Fewer Toys, More Focus
Toy rotation means keeping most toys out of sight and putting only a few out at a time. The goal is focus, not variety.
Too many toys on a shelf leads to the same behavior every time: a child flips through everything, plays with nothing, and asks for a screen.
Here is a simple rotation system:
- Divide toys into three groups. Group A, B, and C.
- Put out Group A only. Store B and C out of sight.
- Swap after one to two weeks. Bring out Group B, put A away.
- Watch what gets ignored. If a toy is skipped twice, it is either too easy or too hard.
This is also how you find out what your child actually likes.
Safety, Materials, and Budget: What to Check Before You Buy
Safety comes before everything else, especially for babies who mouth everything. Check for small parts, sharp edges, and finishes you cannot identify.
Choking Hazards and Age Labeling
The single most useful safety test is the toilet paper tube. If a toy or any detachable part fits entirely inside a standard toilet paper tube, it is a choking risk for a child under three.
Check every toy for parts that can come loose: buttons, beads, magnets, small wheels. A toy that passes the tube test on day one can fail it after a month of play if a joint loosens.
Materials and Finishes
What a toy is made of matters as much as how it is shaped.
- Solid wood over plywood or MDF. Solid wood holds up to teething and rough play; plywood and MDF can splinter or delaminate when chewed.
- Water-based or food-safe finish. Natural wood with a water-based or food-safe finish is safest. Avoid finishes you cannot identify, and anything with a strong chemical smell out of the box.
- Non-toxic paint. Look for water-based paint labeled non-toxic. Avoid chipped or peeling paint, which can be swallowed.
The Consumer Product Safety Commission toy safety guidance is worth a read before any toy purchase, especially for children under three.
Supervision and Wear
No toy is a substitute for supervision. For children under three, stay within arm's reach during play. Check toys monthly for loose parts, cracks, and worn finishes. A toy that has been chewed through, cracked, or has a loose joint should be repaired or retired, not passed down.
Budget: Cost Per Use, Not Sticker Price
On budget, think cost per use, not sticker price. A toy used every day for a year costs far less per use than a cheaper toy ignored after a week, divide the price by the number of days it actually gets played with.
A few habits keep a collection affordable:
- Buy two or three pieces at a time. Spreading purchases over months matches the staged plan and keeps you from overbuying.
- Test with DIY first. Make a cardboard posting box or a fabric scrap basket before buying a wooden version. If your child returns to it, the purchased version is worth it.
- Prioritize one-skill toys. They get used longer because they match a specific developmental window.
The Carrots Harvest Box and the 6-in-1 Activity Cube are both built from solid wood with non-toxic, BPA-free materials, the standard we hold every piece to.

Conclusion: Build Slowly, Observe Often
The hard part of building a Montessori toy collection is not finding toys. It is resisting the urge to buy them all at once.
That is how we build every collection at Project Montessori: educator-approved toys, rooted in the Montessori philosophy, chosen to support independence and creativity at each stage.
Shop now and start with one piece. Watch what your child does with it, then build from there.
Frequently Asked Questions
How do you build a Montessori toy collection without overspending?
Start with one or two open-ended toys per developmental stage, then add as you observe what your child reaches for. A shape sorting cube or busy board covers months of skill-building for under $35. Mix in DIY options like a treasure basket of fabric scraps, empty jars, or cardboard boxes. Track cost per use rather than sticker price: a toy played with daily for a year costs far less per session than a novelty item abandoned in a week.
How often should you rotate Montessori toys?
Most families rotate every one to three weeks, or whenever a toy sits untouched for several days. Keep six to eight items accessible on low shelves and store the rest out of sight. When you swap items back in, children often treat them as new. Watch for signs of boredom or frustration, and let your child's interest guide the timing rather than a strict calendar.
Can you make Montessori toys from household items?
Yes. Common DIY Montessori toys include treasure baskets filled with fabric scraps, wooden spoons, and safe kitchen tools; posting boxes made from empty containers; and sensory bags with pom-poms or bubble wrap sealed inside. Always check for choking hazards, loose parts, and non-toxic finishes before handing anything to a baby or toddler, and supervise play with homemade items the same way you would with store-bought toys.
How many toys should be in a Montessori play area?
Aim for six to eight toys on low shelves at a time, plus a small basket or two of rotated items. This keeps choices manageable and encourages deeper, independent play. Store the rest in bins organized by type or age. Fewer, well-chosen toys make it easier for toddlers to focus, and they help you see which skills your child is ready to practice next.